
Adventures in narrowband urban astrophotography

Narrowband filters allow us to create dramatic, high-contrast images of certain deep-sky objects even under heavily light-polluted or moonlit conditions. As an astrophotographer living in a medium-sized city with few clear nights (all of which seem to occur around full Moon), I find these accessories remarkably useful. Narrowband filters typically target one of the bright emission lines produced by ionized hydrogen (H-alpha), sulphur (S-II) or oxygen (O-III). These wavelengths are important because they account for a large portion of the light in emission nebulas, which are some of the most photogenic objects in the night sky.
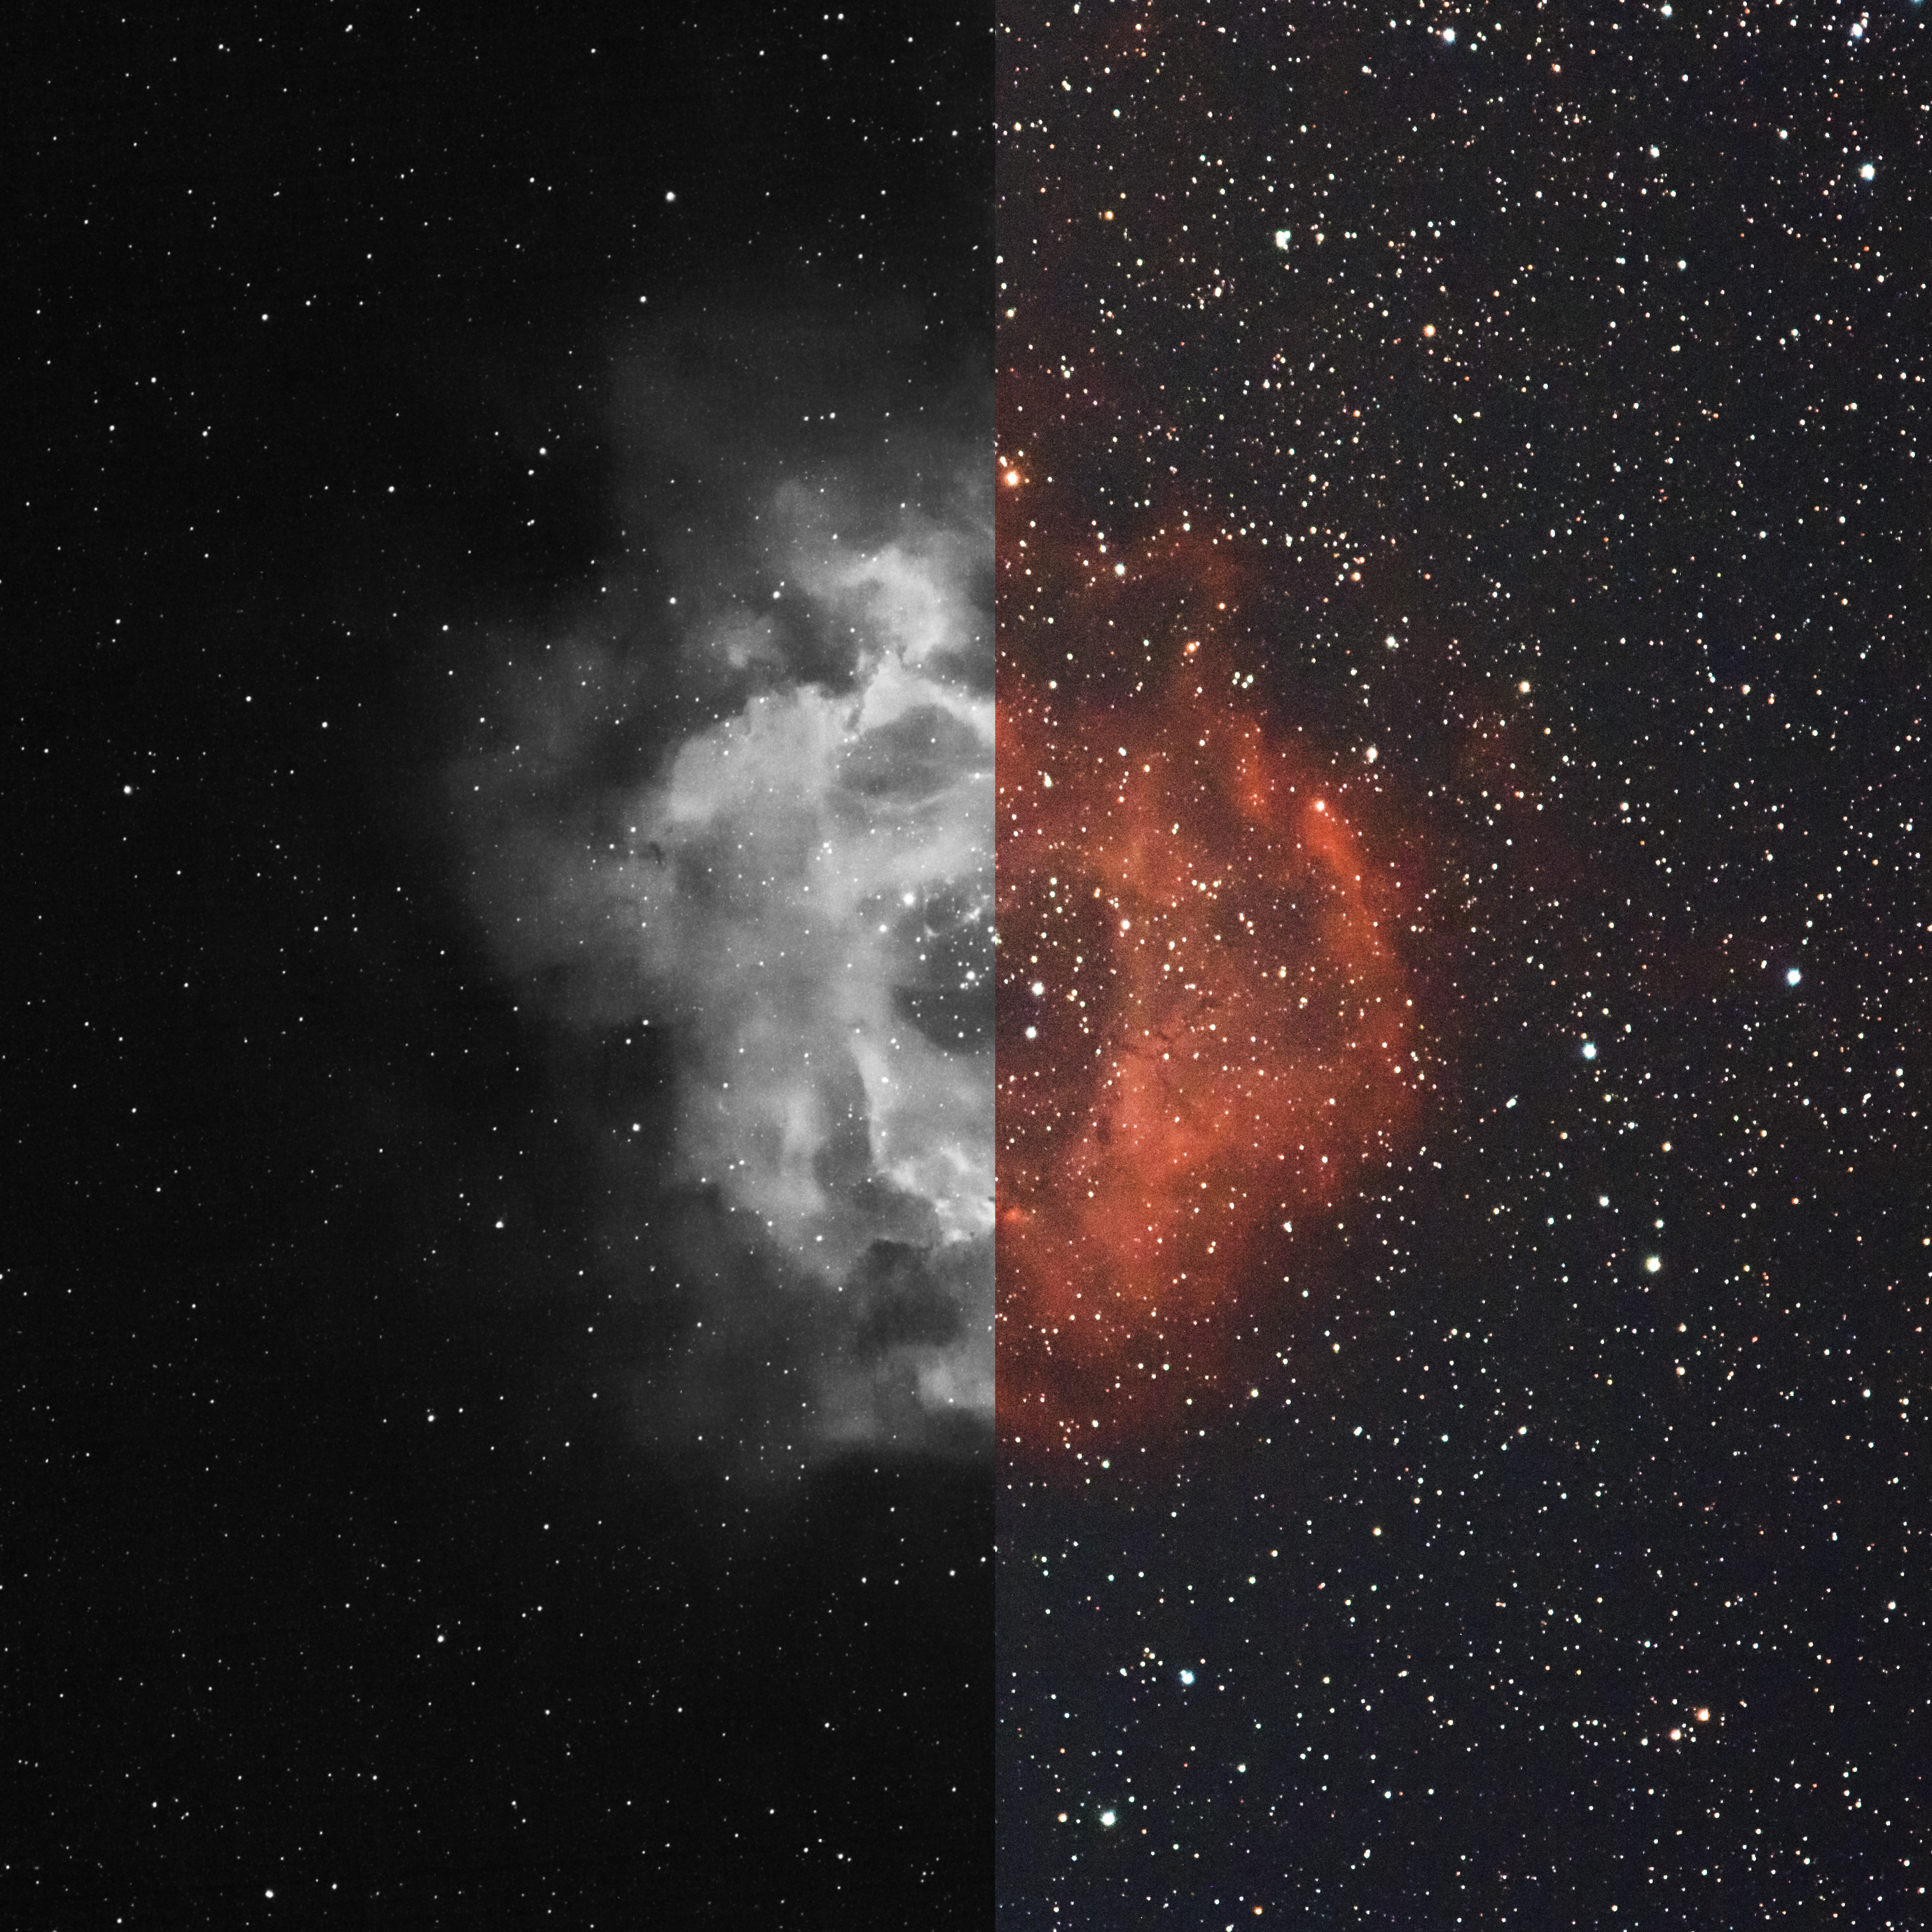
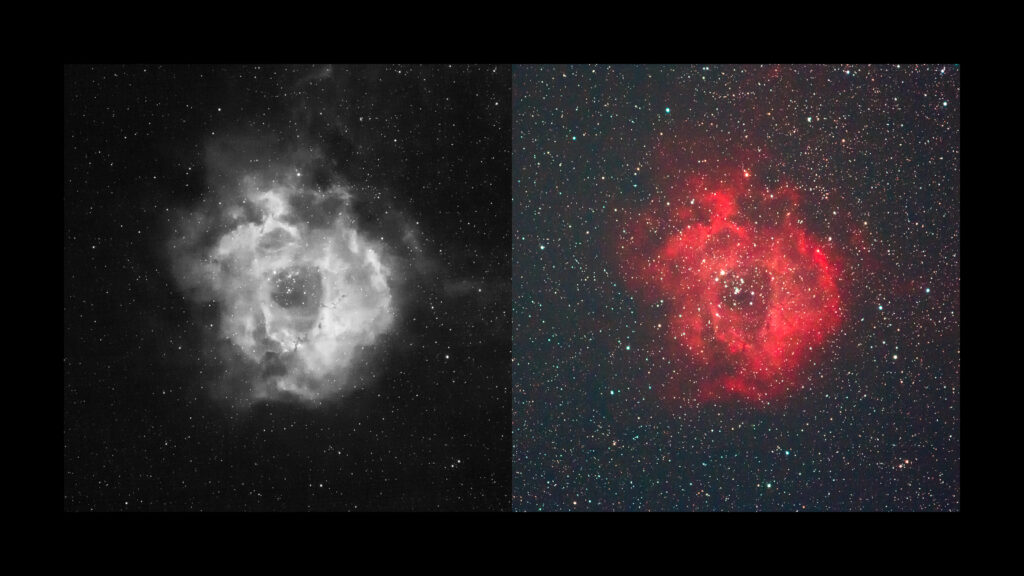
Suitable filters are available in a variety of bandwidths, from 12 to 3 nanometres (nm), the narrower versions providing the greatest contrast, albeit at the highest price. The data are monochromatic, since only a single colour reaches the camera sensor—deep red in the case of H-alpha and S-II or teal from O-III. The resulting astrophotos are often rendered in black and white. However, exposures utilizing all three filters can be combined in postprocessing to make false-colour images by arbitrarily assigning the data to red, green and blue (RGB) channels. This technique was made famous in 1995 by the Hubble Space Telescope’s Pillars of Creation portrait of the Eagle Nebula, M16.
Camera Considerations
Narrowband filters are most often used by advanced astrophotographers equipped with specialized monochromatic cameras, but I was curious to know whether they’d work on my DSLR, a Canon EOS 60D. The difficulty inherent to cameras designed for daytime snapshots is the built-in filter in front of the sensor that blocks (or severely attenuates) the desirable deep red wavelengths from nebulas. Like many astrophotographers, I’ve had the filter replaced by one that transmits more red light. A Google search will turn up several firms offering “astro-modification” services or selling pre-modded DSLRs.
A second problem with conventional cameras (even when modified) is the microscopic filter grid, known as a Bayer colour array, that is a fundamental part of the imaging sensor. With the Bayer configuration, each individual colour pixel is really a tiny 2×2 photosensor array consisting of one red sensor, two green sensors and one blue sensor. If you use an H-alpha or S-II filter, only one out of every four photosensors (the red ones) contributes to the picture. The loss in efficiency means you’ll need much longer exposures to record nebulas.
I decided to take the plunge and purchase an Astronomik H-alpha 6nm CCD filter for my Canon. Although I’d be limited to monochrome imaging, I’m a big fan of black and white photography, so I wasn’t troubled by this restriction.
Lights Out
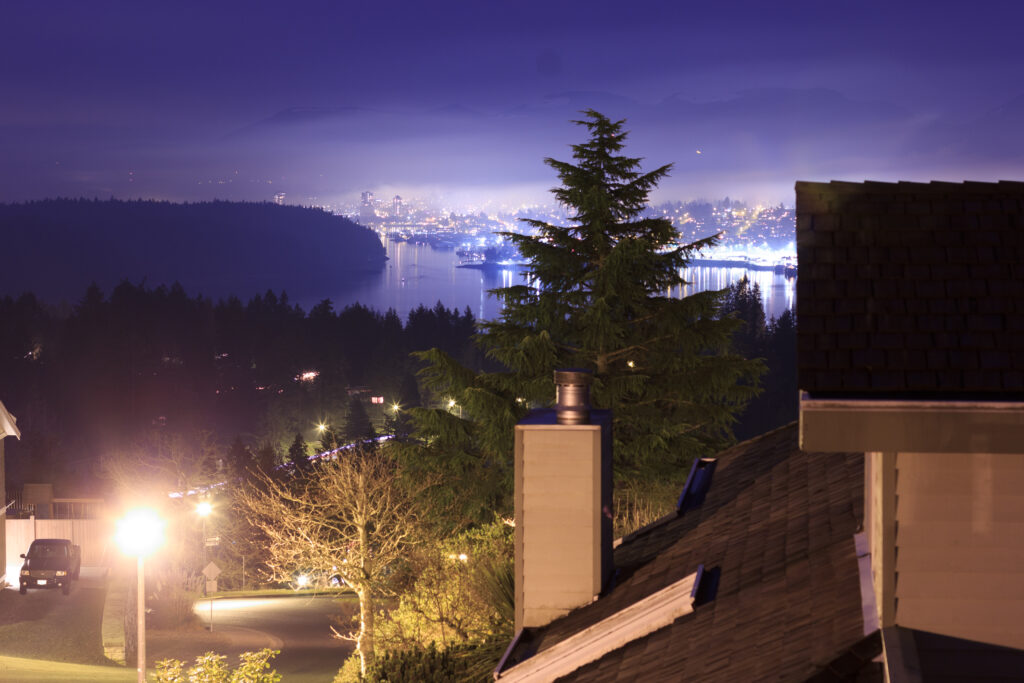
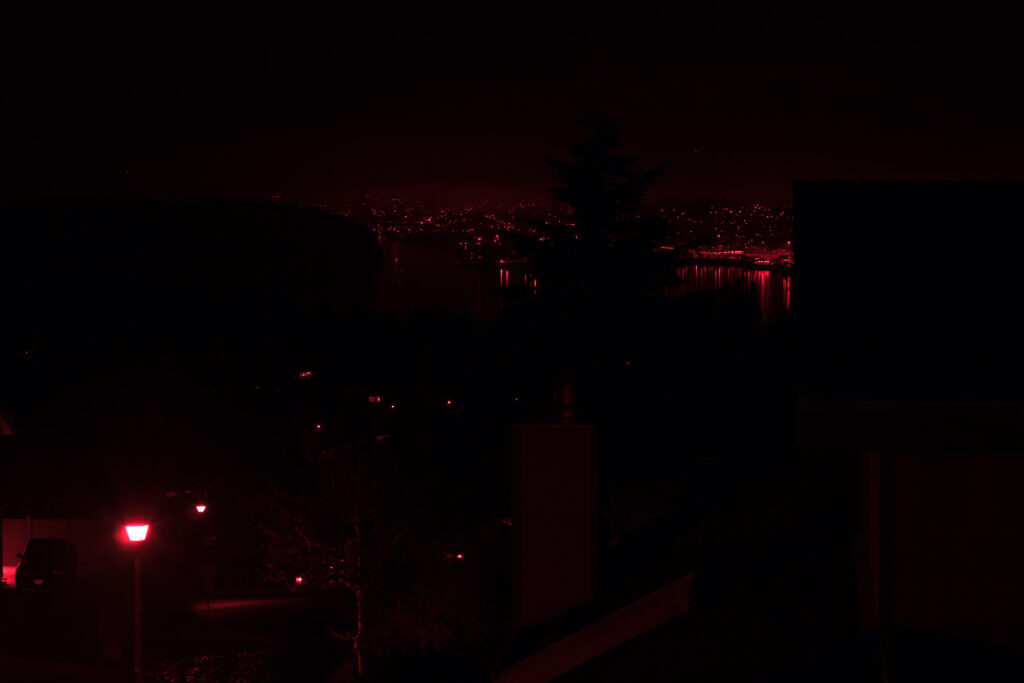
Holding the H-alpha accessory up to my eye while staring at nearby streetlamps made me appreciate the tremendous amount of light it blocked. Clearly, focusing the camera was going to be a challenge, since few stars are bright enough to be visible on the camera’s rear screen with “live view” engaged. Thankfully, some stars do manage to shine through. For the shots presented here, I used zero-magnitude Capella as a focus target.
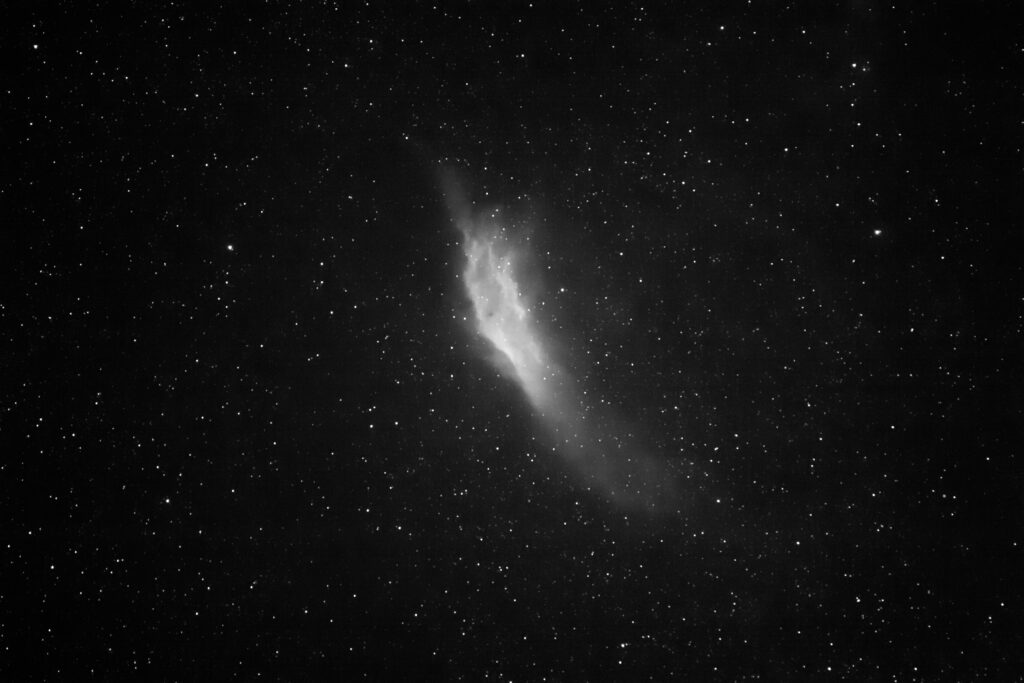
My first night out quickly showed that the H-alpha filter cuts through light pollution and moonlight amazingly well. Despite a waxing gibbous Moon hanging above the city skyline, I was able to record nebulas in 10-minute exposures at ISO 1600. I realized I should have acquired dozens of frames of each object, then stacked them to reduce image noise (and I’ll get around to doing that at some point), but I was so excited to see what the “new light” gave me, I bounced around the celestial sights like a kid in a ruby-red candy store.
Of course, the long exposure times narrowband filters demand mean that a tracking platform for your camera and lens is an absolute must. For shots with short- to medium-focal-length lenses, you can get away with a portable sky tracker, but if you use longer lenses, an equatorial mount (probably with auto-guiding) is necessary.
A Different Process
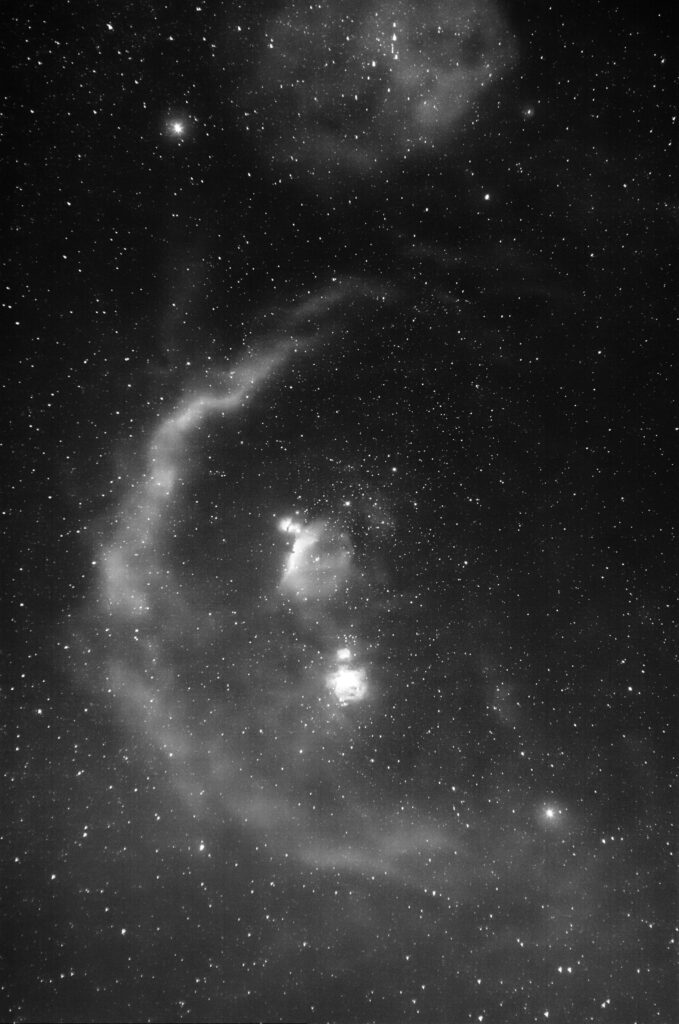
After my first night shooting with the H-alpha filter, I sat down to process my images. I found that I needed to modify my usual workflow, since only the red channel contained useful data—the blue and green channels just yielded noise. I used the Channels feature in Adobe Photoshop to disable the green and blue channels, then converted the resulting image to greyscale. Finally, I processed the shots in Adobe Lightroom, as I would with normal black and white photos. I particularly liked the look I could get by cranking up the Contrast and Clarity sliders.
These nebula portraits were captured when the outside temperature was hovering near freezing, yet I still had to employ a substantial amount of luminance noise reduction in processing. In warmer weather, taking dark frames and multiple images for stacking will be even more essential to reduce noise.
Although greyscale images are remarkably striking, you can combine narrowband and colour data to get what is called an H-alpha RGB image. To perform this bit of processing magic, you need both colour and H-alpha versions of the desired nebula. Return to the Channels feature in Photoshop, and either completely replace the red channel in the colour photo with the H-alpha image or blend the H-alpha data into the RGB information. I tried this “H-alpha transplant” on a few of my older colour nebula portraits and was encouraged by the results.
DSLR H-alpha shooting has proved more exciting than I dared hope. If you own an astro-modified camera and are already comfortable with long-exposure imaging, I’d encourage you to give narrowband astrophotography a try. Yes, there are challenges and limitations, but the end result can be very gratifying. And being able to shoot despite heavy light pollution or bright moonlight is extremely helpful.
Tony Puerzer is a full-time professional photographer and part-time amateur astronomer living in Nanaimo, British Columbia.